Friday, September 28, 2012

Creative Wedding Gift: Upcycled Invitation

http://christyrobbins.blogspot.com/2011/07/wedding-invitation-ornament.html 
I always feel so bad throwing out wedding invites after the big day has passed.  I know how much time and effort the bride & groom invest in choosing, addressing, and mailing them.  I knew it would make a wonderful keepsake for the happy couple, I just didn't know what to do with it (besides framing it).  So, I searched Pinterest and found a wonderful idea: using the invite to make an ornament for the Christmas tree!  It was super simple & I think the bride & groom really appreciated it.  I am currently on a hunt for one of our wedding invitations from  9 years ago in hopes that I can do the same for my hubby & I.  We love Christmas and we love reminiscing over each ornament, remembering who gave it to us, what year, and why it's so special.

The link to the original pin is below the picture.  I did upload my pics (not great, so definitely look at the link) and directions under the Gift Idea tab.

Thanks for stopping by!
M.M.


Wednesday, September 12, 2012

It's Been Too Long...

OMGoodness!  Where has the time gone?!  I've wanted to share so many wonderful projects with you, but life has been crazy (a good crazy).  Thought I would take the time to say hello again and let you know what's on deck for the remainder of this month.  
* Part of our bathroom makeover
* Wedding gift ideas (great one for those Christmas-time weddings)
* Fall crafts with the kiddos
* Gift/craft for that furry friend of yours (I'm talking about your dog or cat!)

Before the holidays are in full swing there will be a pantry makeover  & a great idea for that holiday wreath your front door is yearning for. :)  Please continue to check back.  My goal is to begin posting (with pics)  these projects next week.  Can't wait to share!  Looking forward to your feedback and the wonderful ideas you have too!

Thanks for stopping by!
M.M.

Monday, July 30, 2012

What Lies Beneath?!

 It's officially been a year since the big move into our "dream" home (in the making :).  We've had so many things on our to-do list with the interior of the house that we really didn't worry about the exterior.  Our lot is paradise and really does take care of itself when it comes to the landscaping.  One of our favorite features is the ginormous flagstone patio that wraps around the entire house.  The more time we spent outside the more we noticed that it was very "dirty".  We tried scrubbing it with a broom and saw a little bit of a difference.  Then, my hubby & I put our heads together and decided to power-wash the patio and brick walls.  We also used Oxy-Clean to help us out.  YOU ARE NOT GOING TO BELIEVE THE DIFFERENCE!!  Take a look at the before and after pics below.
Before on the left. After on the right.  Patio not done yet.
Pat power-washed Wyatt's name on top of the brick wall!

Our pineapples.  Before & after!

So bright & clean!

Patio not done here, but great view of brick wall!

Thursday, July 19, 2012

SPOTLIGHT: Sarah's Summer Wreath

I'm excited that Sarah is back to share!  LOVE her summer wreath idea and it is SO simple.  It looks festive (and oh, so creative!) on the front door.  Makes me want to listen to a little Jimmy Buffett with a fruity beverage in my hand (hmmm...maybe while I make one?:)  Enjoy this "pintastic" project!  
Drink umbrella wreath
Another HUGE thank you to Sarah for sharing her wonderful creation with us!  Click on the Projects 4 Fun tab to see step by step directions.  

Tuesday, July 10, 2012

Closet Clutter GONE! (at least in one closet:)

I am back!  What a wonderful vacation with the family.  Completely unplugged for a week (no choice, no internet;).  I'm so excited to get back in the swing of things and share all of the wonderful projects we've been up to in the Murray household.  I really think the hubs is going to scream if I bring one more thing home for a project without completing what I've started.  Anyone else guilty of this?  I just get so excited, but nothing beats the feeling of completion, especially when it comes to organizing!

Right now, like most of you fellow vacationers, my house looks like a tornado.  Clothes everywhere (I can finally see the floor in the laundry room thanks to my awesome hubby!).  Speaking of clothes, it was such a great feeling (& yes, fun...I know I must be sick) putting Wyatt's clothes away.  I finally put the finishing touches (at least for now) on Wyatt's closet.  He has the largest closet in the house (yes, jealous) and it's been so difficult to find a way to organize it so we can easily find everything.  Trust me, anyone who enters Wy's room will be able to find what they need (sigh...happy face).  The dreaded question, "Do you know where __________ is?", has been eliminated when it comes to Wyatt's stuff.  WOOHOO!  Ok, here goes...

Problems & Solutions:
Problem: Large closet with single bar for hanging clothes.
Solution:  Rubbermaid (adjustable) closet organizer. LOVE!

Problem:  No dresser in room so EVERYTHING goes in closet.  Difficult to organize little clothes all on hangers.
Solution:  $ Store bins (I know, I can't help myself.  I LOVE the $Store.).

Problem:  Locating specific pieces of clothing. (No label maker or printer...both on Christmas list)
Wyatt loves the lights!
Solution:  DIY picture labels for each bin.  (How-to posted under Project Organize tab)

Problem:  No closet lighting!
Solution:  Click lights from $ Store. Wyatt LOVES them! These are temporary for now, but do the trick.  


This is only half of his closet!


(I apologize for the shadows in all of the pictures.  Wy's room is so dark.  This was with all the lights on in the room and shades up.)

 I can't wait to get my hands on Weston's closet!  The Rubbermaid organizer is installed so it's like a wonderful blank canvas staring at me every time I open the doors. :)  Hoping to finish it and post pictures in the next few weeks.

Happy Organizing,
MM

Tuesday, June 26, 2012

Toy Clutter

With all of the beautiful weather we've been having in NY I decided it was time to organize the garage (which by the way is only half done).  To start, I wanted to find a solution to Wyatt's outdoor toy chaos.  It was important to make whatever system I created easily accessible to Wyatt.  I wanted him to independently take his toys out & maybe, by some miracle, put them away too!  I decided that bins were the easiest way to store the small toys and I moved the shelves so that Wy's big trucks could fit in the cabinet too.
Repurposed File Cabinet

Everything has a place!
 Believe it or not, Wyatt absolutely loves this system!  He is able to open the cabinet on his own & easily take out the toys he wants to play with.  Since taking this picture, one of the white bins is now solely dedicated to his garden tools. :)  This cabinet is a huge timesaver and definitely helps keep the toy clutter in one place.  To top it all off...Wyatt puts away his toys & closes the doors of the cabinet!

It was really difficult for me to not make the cabinet "pretty".  It was more important to put a system in place and use it.  Maybe the "prettying" of the cabinet will happen at a later date. :)

Happy Organizing,
MM

Sunday, June 24, 2012

"Tie" Raid

Alrighty, I am back in business!  I finally purchased a new memory card for the camera today which means lots of new DIY and organizing project pics.  Woohoo!

To kick it off let's talk ties. :) So, as part of the hubby's Daddy's Day gift (& my obsession with organizing) I took it upon myself to find another way to organize all of his ties.  In hindsight, I wish I would have taken a before picture of the ties.  I did take a picture of the "tie hanger" they've been on for years. Looks like this. 
Old system = tie hanger

 It looks like a fantastic idea and definitely kept the ties in one place.  However, there are fifteen spots on each side which totals thirty ties.  The hubs has 50+! I know it seems like a ridiculous amount, but he wears one every day.  When the ties were on the hanger he was only circulating through a handful because they were doubled up or on the floor.  There's no way he even knew what he had.  You should have seen his face after I organized the ties...there are some he hadn't seen in years!  I will definitely repurpose this hanger.  The wheels are already turning.  

Okay, time to share my $ Store solution!  I posted about their "compartment bins" a few weeks ago.  I use them to store the cords for the electronics. Well, turns out they're perfect for organizing ties too!

Yes, I color coordinated each bin!
Q:  What do I love about this?  
A:  EVERYTHING!  
It allows my hubby to see each tie (he purged a few ties so he now has 48).  ALL of the bins fit in a dresser drawer (6, that is 6 bins not 6 drawers!).  It is easy to rotate the bins so there are new ones on top each week!  And yes, it was so nice to color coordinate the ties in each bin (especially for a color-blind hubby).  Bonus, according to the hubs...he has more room in his second closet ( I know, not typical, but his suits, dress shirts, and ties take up an entire closet).  Taking on the second closet is going to be like an Olympic sport.  Not ready to do it yet,  but will in the near future. 

$ Store bins were the perfect solution!  

Turns out organizing the ties was a gift my husband appreciated and one that made me happy too! Thanks for stopping by!

Saturday, June 23, 2012

Spotlight Time!

Thanks for visiting!  I am so excited to share with you today.  After seeing one of my most crafty friends post a recent project on FB, I knew I had to share it with you.  My very good friend Sarah was kind enough to send me the step-by-step for her patriotic wreath (click on the Projects 4 Fun tab at the top for the how-to).  I think it looks amazing!!  Take a look for yourself.
Sarah's Patriotic Wreath
Can't you just picture creating some of this yarn and ribbon goodness for every holiday?!  Orange and black for Halloween with little pumpkins or spiders on the side.  Maybe green, red, and white with Christmas trees or blue and white with snowmen.  I'd love to do one like this, red, white, and blue, with the Buffalo Bills logo in place of the stars or maybe little footballs or #22 (yes, I heart Freddie Jackson!).  How cool would that be for the football fan in your life?  I always see fans flying their game day flags...why not a game day wreath?!  The options are endless!

A huge thank you to Sarah for taking the time to share this wonderful project!


Thursday, June 21, 2012

Broom Closet Bliss...Finally!

BEFORE 
AFTER
Goodbye clutter, hello organization!  My broom closet/cleaning closet was a nightmare.  After we moved last August the closet became a catch-all for anything that didn't have a place in the kitchen.  My cleaning supplies were stored under the sink (horrible when I was pregnant and trying to get to everything!).  I always imagined having a place for the ALL of the cleaning supplies:  swiffer, bona, broom, floor cleaners, fresheners, glass & counter cleaners, refills, garbage bags, sponges, and caddy.  Well, imagine no more.  I've also added some details under the PROJECT ORGANIZE tab.  


Tuesday, June 19, 2012

Daddy loved his gift...

I hope everyone had a wonderful Father's Day!  It was such a beautiful weekend.  Believe it or not, I finished the Daddy's Day gift just in time!  I created a photo collage of Wyatt and daddy fishing for the first time together.  I loved the black and white pictures and thought the collage would be a wonderful addition to his hunting/fishing mancave.  Although I still need to frame it, I thought I would post a picture anyways.  I used foam board, sticker letters, scrapbook fishing, & mod podge.  I think once I frame it, it will have a nice finished looked.  I'll be picking up the frame from a large barn sale over the 4th.  Pictures will follow!


Thursday, June 14, 2012

Father's Day

Yes, it is only 2 days away!  I know I am probably the only wife, daughter, and daughter-in-law on earth that's waited until the last minute to create, buy, build, order, beg, borrow, or steal Father's Day gifts.  So, here is my quick fix for all of you "last-minuters" like me (yes, that is now a an official title).  I found some great gift ideas on Pinterest today that led me to a blog I find myself constantly looking at, The Tip Junkie. (Click on the link to see 32 homemade gift ideas for dads/grandpas.)  There are really cute ideas that have been gathered from various sites.  I LOVE the homemade cards! I posted a few of the ideas found on The Tip Junkie's (Laurie's) site below.  
Daddy's Car Wash Kit
Daddy's Tie Rack

I'm as lucky as can be...
I would love to know if you complete one of these projects! I'll be sure to post daddy's gift next week.  Yes, I am still in the process of finishing it with the two best helpers I could ask for, Wyatt & Weston. :)

Wednesday, June 13, 2012

Wyatt's Garden

With the summer weather finally smiling on us (at least it's just started in upstate NY:), I thought I would share a project Wyatt, Grampy, & I worked on in May.  When we moved in to our house almost a year ago, the former owners had an herb garden on the side of the house.  I know some of you would probably be so excited, but I don't know the first thing about herbs.  If it's not garlic powder, onion powder, sea salt, or pepper, I'm probably not using it when I cook (yes, on those rare occasions when I am hands free and can actually prepare something before 9pm).  With that said, I decided to dismantle the garden (ok, tear out all of the herbs). but I couldn't decide what I wanted to do with the space so I left it alone.  In May I finally decided to make this a special space for Wyatt (my super active 18 month old who loves to dig whenever & wherever the mood strikes him).  My hope was to create a space he would :

1.  recognize as his own
2.  learn to care for
3.  contain his digging in one area
Wyatt's Garden
Let me just tell you that to say this space was a success is a gross understatement!  Wy absolutely LOVES his garden!  He waters the flowers (and seems to think that pouring dirt on them helps them grow too), he digs in the dirt, he kisses the frogs, & waves hello and goodbye to the garden.  It really makes my heart smile to see him so happy & independent.  (We had a playdate a few weeks ago and the two toddlers that visited loved watering the flowers too!)  It keeps him busy for hours. :)

If you'd like to learn more about the the materials I started with and what it cost, please click on the EVERYTHING KIDS tab.  You'll find Wyatt's Garden details listed.

Tuesday, June 12, 2012

Great Baby Gift Idea

Thought I would share something I make often thanks to my mom.  These wood blocks with vinyl lettering and bows make such a cute baby gift!  I've given them to many new mommies.  It's great because I can pick colors for the blocks, lettering, and ribbon to match the nursery.  Usually you see these blocks displayed on book shelves or wall shelves, but a nice twist is to adhere them to the door or a wall of the nursery.  I will post more pics of these blocks under the Gift Ideas tab this week.  So fun to make and such a personal touch.  


Monday, June 11, 2012

Upcycled Crystal Light Containers

I hope you had a wonderful weekend!  It was a very productive and fun one in our house.  I did realize that I need to organize the way I tackle projects.  I have a list of projects (literally a mile long) I want to do.  I have a bunch of projects halfway done.  I have a handful of projects done and ready to share.  I just get so excited about the ideas I see and the ideas I have that I just go for it.  Starting today I will be catching up on posting the projects I have already completed, starting with the upcycled Crystal Light containers.  I will continue to share one a day.  In the meantime I will be working on putting the finishing touches on other projects (broom/cleaning closet almost complete & bucket game almost done).  

Upcycled Crystal Light Containers
On Pinterest (of course :) I saw an idea to store crayons in a parmesan cheese container (anything is better than the cardboard packs they come in).  The only thing I didn't like about it was how difficult it was to get the crayons out, especially for Wyatt.  So, I started looking in the cupboards and realized the hubs and I drink a ton of Crystal Light and I'd been throwing out the containers for years.  So, I used the individual packs container and the pitcher packs container to store Wy's crayons.  They work perfect!  It is easy for his little hands and fingers to retrieve the crayons and he loves taking on and off the top. Plus, he can see the crayons through the container and loves to put them away!  BONUS! :)  (I added the vinyl pics & label for fun.)  I've also used these containers to store craft supplies, chalk, office supplies, batteries, ...you get the picture.  The see-through aspect makes these containers so versatile!  I love them!  How will you upcycle your next empty Crystal Light container?

Thursday, June 7, 2012

Catching Up

I've been so excited to share some of my recent projects with you!  I am happy (& relieved) to say I put the finishing touches on many of them & took some pics.  Thanks again for your patience.  Chasing around a 20 month old & caring for a 4 month old keep me busy & on my toes. :)  Just wish I could bottle their energy for myself!

Okay, here goes.  Most recently I completed a pallet table.  I found pictures on pinterest & knew it would be a perfect fit for our patio.  We live on a wooded lot & the views in my opinion are breathtaking.  My hubby & I love to relax on the patio every chance we get, but the patio set is so large and located on the side patio.  We wanted something affordable (under $25) & durable. To complete the look, we added 2 plastic Adirondack chairs (perfect height for pallet table!)  I LOVE the table.  I mean really LOVE it.  My hubby was so nervous that it would look "junky" ...not anymore! Check it out!


Click on the Projects 4 Fun tab to view the step by step directions for the pallet table!

Saturday, June 2, 2012

Genius Storage Containers

All I have to say is SCORE!  In the midst of Project Organize I came across two very cool storage containers for cords, etc.
Option 1:  Because I am sticking to a budget and trying to be quite frugal, I originally used baskets I had around the house and used the bottle dividers found in cases of adult bevies.  It worked wonderfully!  That is, until I started to organize the linen closets, I really wanted to use the baskets to store hand towels & wash clothes.


My solution, Option 2:  I went back to one of my fav shopping spots, The Dollar Store, and found "canvas" bins (like the ones I already had for my family file system) that have dividers that velcro in!  They aren't as sturdy as the bottle dividers, but they worked great!


Option 3:  Yesterday I was shopping and came across the Rubbermaid Bento bins...OMG!  They are an organizing blessing.  A ridiculously awesome idea (one I should have thought of!).  The "bento" part actually reminds me of those snap bracelets from the 80s & 90s.  They were reasonably priced & came in a bunch of cool colors & patterns.  Tops or "trays" for these bins were available to purchase separately.  They can be put on as a top or flipped over to create a tray to store more on top...genius again!

There you have it.  Three options varying in price range.  One upcycled, the second a dollar, and the third a little more expensive, but sturdy, versatile, and just plain cool!

Monday, May 28, 2012

Happy Memorial Day!

What an absolutely beautiful weekend at the River!  I apologize for not posting my finished product pics, but we all unplugged and spent some quality family time together.  So much fun!

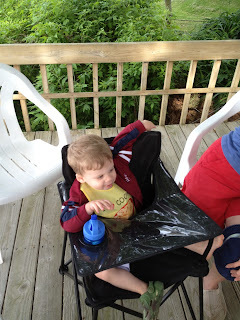
Wyatt relaxing & lovin' time in his chair!
I want to take a quick minute to share a cool find.  Where from you might ask? I found it on Pinterest and mom gave it to me for Christmas.  We were always looking for a high chair that would be easy to cart around and store.  We have a space saver chair for the house and a booster, but both of these chairs require a chair at the table.  I found a traveling high chair, "Ciao!  Baby" Portable High Chair (the-go- anywhere-high-chair), that folds up like the adult lawn chairs we have.  It even comes with its own bag to travel in, a cup holder (or "holster" as daddy calls it), and a plastic surface that's easy to wipe clean.  It was perfect for the cottage.  We were able to take it out when we needed it and put it away to save on space.  I LOVED the chair because Wyatt was able to join us for cocktail and snacks on the deck and eat at the picnic table.  The picture says it all! Oh yeah, and you can order the chair by clicking on the link: Ciao! Baby Portable High Chair.

Sunday, May 20, 2012

Projects Galore!

This weekend was phenomenal!  Beautiful weather, productive, and lots of time with the family.  To say I am excited would be an understatement.  I am bursting at the seams to share the projects I completed over the weekend.  I have some finishing touches to add and then final photos to take.  The first project is a game for the kiddos (Wes will enjoy it next year) and for us! I added a cool twist to something I found on Pinterest.  The second project I (or should I say "we" since the hubs was key) tackled was a pallet table.  I know there have been several to view on Pinterest, but I was intimidated to try because there were never any directions.  My hubby was nervous about the outcome and my crazy Pinterest idea, but I can now say he's a believer (& a very patient teacher since he taught me how to use power tools & overjoyed that he now has his shed back for storage:) Well ladies & gents, I will post step by step directions, pictures of the process, and of course, the final product, later this week.

Tuesday, May 15, 2012

Desk Area Organization

 I really wish I had before pictures of my kitchen desk, island, & shelving area.  Our house is older and we've renovated almost everything but the kitchen, so I am trying to make it work.  I LOVE the cupboard space (not the actual cupboards:), but the setup and unique features, like the desk and multiple book shelves create somewhat of a design/organizational challenge.  In my first post I mention how guests at the house kicked my butt in gear.  Below are the "almost finished" pictures of the kitchen area after my butt was in gear.  I have to finish labeling the baskets and hanging the monthly menu planning calendar (my next project!).  It honestly looks like this every night before I go to bed.  It takes me five minutes to put things away because everything has a place.  Imagine that?!  


Best part of the desktop are the blue bins labeled with my
name & my hubby's name.  We put our cell phones, keys, wallet,
hands free, etc. in them.  It has made a huge difference...no more
daily scavenger hunt for these things!  I upcycled soup cans & baby
food jars, covered them with contact paper, labeled them, and
filled them with supplies.  
Both baskets have the dividers from drink cases in them.
One basket has all of the cords (cell phone, Kindle, etc.)
and our Ipod shuffles, labeled in ziploc bags.  The other
basket holds our baby monitors and camera (Yes, we
need an entire basket to house these:).  The other polka
dot bin holds our camera, the charger, and all of the
cords.  I use this every day so the bin provides very easy
access and creates a tidy look.  
$ Store bins labeled "Books/magazines", "Cookbooks", and "Recipes".
Looks so much better like this.  One of the baskets on top has all our sunny day gear in it, sunglasses, sunscreen, chapstick, etc.  Super easy to just grab & go.  

Monday, May 14, 2012

Cool Find!

Trying to find time to get to local thrift stores has been a challenge.  So happy I finally made it there last week.  Found some great deals & created a Mother's Day gift, a 1st anniversary gift for my sister and her husband, and something to help organize my bathroom.  To see details on the gifts, click on the page labeled "Gift Ideas" at the top of the page.  Below you will see my cool find.  I found it in the serving dish section, but saw that it would make the perfect organizer for my bathroom counter top.  LOVE it! 


The tiered dish is perfect!  We don't have a ton of counter space so going vertical with organization is our only option.  I love using the top dish for the earrings & necklace I wear everyday, bobby pins, hair bands, & chapstick!  So great keeping it in one place, off the counters, but easily accessible.  :)

Wednesday, May 9, 2012

Adventures in Organizing Part I

There's nothing like having guests come to the house to kick your organizing butt in gear!  All of those projects I had in mind actually came to life.  Don't get me wrong, we have a long way to go in the organizing department, but boy does it feel so good to have finally left the start line.  The feeling of a tidy, clean, and organized house is almost better than chocolate.  Almost better than exercise.  Almost better than...you get the picture.  My goal was to create spaces so that everything had a place to go.  I was sick of the stacks of papers, the clutter on my table and counter tops, the ridiculous amount of toys that I was sure I would twist or break an ankle on, and the overwhelmed feeling I experienced every day. Did I forget to mention the millions of times my husband asked where his keys were or "Have you seen my phone?"...Miraculously enough I usually found them, but not without lifting stacks of mail or laundry I still needed to fold. I had even implemented the "5 minute rule" for the hubby.  Before he was able to ask me where something was he had to look for 5.  LOL!  It would take anyone more like 5 hours to find something amongst our chaos.   It was time to take action.

We have an open floor plan so the family room, dining, and kitchen are like one big room. I needed to think seriously about storage options.   Like I said before, this is just the beginning of something wonderful. :)  Alrighty, I will explain the steps I took to get started.  I did read some wonderful blogs & had a ton of pins so I will give credit to those that have helped me along the way.  My favorite blog is Iheartorganizing.blogspot.com.  By some miracle this wonderful blog landed in my lap via pinterest.  I am SO thankful. 

Getting Started:
1. Storage "Bins":   Search your house for any bins, baskets, crates, or other storage containers that are not being used.  I found that I was just throwing stuff in bins.  Think outside the box too!  I upcycled soup cans, cereal boxes, and baby food jars.  I found some great (affordable) canvas-like bins at The Dollar Store.  $1 each and super cute.  They came in all different sizes, cute colors/patterns, and were perfect for the space I was working with.

2.  Focus on Area:  Start in one room or one area so you are not overwhelmed.  We have a desk in the kitchen and I knew if I organized the desk it would take care of the clutter that seemed to permeate all the way to the front door! 

3.  Attack the Paper Piles:  PAPERS...argh!  So many papers.  So many piles.  I've tried putting them in bins, one for me and one for my husband...I'm embarrassed to say that one of the bins I found had piles of papers from 5 years ago!!!  Instead of just throwing papers into piles, I found a new file system on pinterest that caught my attention.  It led me to the iheartorganizing blog and the love affair began :) .
Click on PROJECT ORGANIZE on the top tab.

Thursday, April 12, 2012

Pinterest Addiction

A few months ago I received an invite to join Pinterest.  I didn't have a clue what it was and figured out on my own it had something to do with "pinning" and my interests.  Well, that's exactly what it is and SO much more.  I would compare it to a combination of an online dreambook, a perpetual "want to do" list, a personal organizing coach, a place that has everything and anything!  No more magazines for me where I fold over a page or tear out pictures of what I want to do or a recipe I want to make that I will get to some day.  This online personal interest file is absolutely fantastic!  It is because of this platform that I am now attempting to create a personal blog.  So many of the links directed me to blogs, wonderful blogs, by other women.  I can only hope that one day this blog will too be linked to Pinterest in some way and that what I have to say or post will inspire others.